Monday, July 7, 2014

FAMILY GALLERY WALL


Hello everyone!
Today I am sharing with you my latest "adventure". :)
This has been a three week project, but I am proud to tell you, I was able to create 
this gallery wall re-purposing things I already had at home.


I have always loved picture frames and I like to  displayed them in my home with my favorite family pictures.
Through out the years I have changed my frames quite often due to changes in room decor, 
but I always kept my old ones, just in case :) and because of that, I ended up with two big boxes full. 
It was time to put them to good use!
I warn you, this is going to be a long post. :)

Every time I walked by this area in our home, I always thought "got to do something about this", but the days and months went by and it stayed the same.
This is what it looked like. I know, not so good! :)


 This is that same area now.


 To give you an idea, this is the small landing at the top of our stairs, right by the master bedroom and the first thing you see as you walk upstairs.


The long hall table is very old. 
It has been with us for many, many years and has traveled all around the world.
My husband keeps wanting to put it on the curb, LOL, but although is not the prettiest piece of furniture, 
I am really attached to it, so I am keeping it a little while longer.
The first thing I did was update it with a fresh coat of paint.


While it was drying, I made a new stenciled drop cloth runner using the Silhouette Cameo.
You can see that post here.


Then I spent several days choosing the frames I was going to use and painted them in black and silver.
That was a lot of work and when you find yourself at eleven o'clock at night in your pj's spray painting in the garage, 
you know you have a serious problem. LOL
Please tell me I am not the only crazy one!


It took a several days to get them all done and meanwhile, I chose the pictures I wanted to go up on the wall, 
printed them all in black and white and started decorating the table.
On the bottom shelf I added a basket with a pillow, an old family picture and a pretty glass plate.


For the top shelf, I made a second rope lamp.
If you remember,the first one of this set I used as a solar lamp on my back porch. You can see that post here.
I also made for the lampshade a small monogram with our family's initial.


Another old vase was pulled out of the storage closet and I painted it in the same color as the table.
I decorated it with some twine and once again, using my Silhouette, 
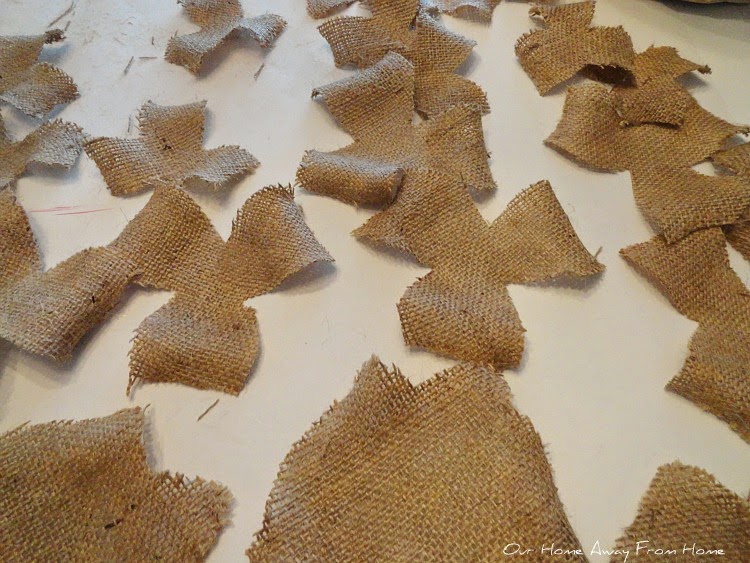
I made some burlap flowers to display inside the vase. 


I finished the table top by adding our wedding picture.


 At this point, I had all the frames finished, but first I wanted to create a focal point which I did by using 
another old frame, a bit of drop cloth and some vinyl.


And then I was ready to start arranging pictures on the wall.


 It is the first thing I see every morning when I leave my room and it just makes me smile. :)
The people in those pictures are what I love most in this world.


What do you think? Better? 
I am not going to lie, this was a lot of work. 
I think it probably would of been easier if I just bought everything new, but I had challenged myself to upgrade this area of our home without spending any money and I am happy to say, I did! :)

Thank you all for your visit.
See you soon!


SHARING WITH:


TUESDAYS AT OUR HOME # 68


Hello, everyone.
Welcome to Tuesdays at Our Home!
So happy you stopped by for a visit. :)

 Last week we had some really beautiful entries.
Many wonderful projects to stay busy during these Summer months and so much beautiful inspiration.
Lets take a look at some of the entries.

Ashley from 3 Little Greenwoods shared a beautiful chandelier makeover. 


 Jennie from The Diary of a Real Housewife  shared an amazing recipe for strawberry shortcake.


 Angela from Twelve Oaks Manor 
shared her gorgeous front porch patriotic decor.


Noreen from Crafty Journal shared a great tutorial on how to make an aluminum can dimensional star.


Kimberly from Lou Lou girls  shared a very nice recipe for Southwest chicken salad.


 Poppy from Poppy View shared her before/after beautifully decorated corridor.


Thank you, again, to all who took the time to participate!
 I always appreciate your visits and wonderful comments!

If you were featured, please feel free to grab a "featured button" from my sidebar.


  And now, lets see what you have been creating this week!

You can link up any posts that are home decor, gardening, crafting, painting, sewing, cooking or DIY related.   
NO Etsy shops, please.
 
And although there is no rules to join, I would love if you start following my blog.


  Have fun!


HOW TO MAKE YOUR OWN THROW BLANKET


I hope everyone had a very happy 4th of July.
Our holiday was quite, but very nice. A little barbecue, a couple of movies and some much needed relaxing time.
Just what we needed.
The rest of the weekend has pretty much been work, work, work. :) After numerous trips to buy lumber and tons of concrete, the construction in our back yard is in full swing.

And today, more of the same. 
Due to this chaos and the fact I have all the members of this family home on vacation, 
I will be late posting Tuesdays at Our Home link party.
Instead of being live this afternoon, it will be up either late this evening or first thing tomorrow morning.
I apologize for this.

Meanwhile, here is a little tutorial on how I made the throw blanket for our new bedroom bench.


I had bought this fabric at Walmart a while back. It was $5.00 a yard, so I knew I could make something with it.
The width of this bolt was 47" and it was double fabric.
I bought one and a half yards.


I measured six inches and using my seam ripper, I started taking the little squares apart very carefully in a straight line.


I gathered 10 strings at a time and tied them together in a knot.


I continued doing this on both ends of the fabric.
Once I was done, I sew the sides in the sewing machine, but you can also use hem tape or fabric glue.
It was very easy to make, but time consuming.


Love how it looks on my new bench. :)
Thank you so much for your visit and I will be back with the link party.

Until then!


Thursday, July 3, 2014

HAPPY 4TH OF JULY!


HAVE A SAFE AND WONDERFUL HOLIDAY WEEKEND!


PARTY PAIL/ 4TH OF JULY TABLESCAPE


Hello, everyone!
A few weeks ago, I received an email from a company, Party Pail, 
which liked my blog and asked me to review some of their products.


After researching their online store, I was extremely impressed with their products 
and specially how attractive and inexpensive they are.  
Party Pail has every kind of party supplies you may need to plan and create a beautiful baby shower, birthday party, 
or any other celebration, so, I agreed to review some of their products and create a patriotic tablescape with the supplies they sent me.

I really wanted to create this tablescape on the back porch table, but due to the weather, it was not possible.


The plastic plates, silverware and cups are really good quality and very sturdy and the paper place mats 
with the scalloped borders are just adorable.
The red gingham napkins and table cover are just perfect for any Summer celebration.


 And the dessert cups are just so pretty and the perfect size for a quick little treat.


And to make the tablescape a little more festive, I added two candle holders decorated with 
red, white and blue dyed rice that I made and a pretty patriotic flower centerpiece.


If you are planning a special celebration or party in the near future, you may want to visit http://www.partypail.com/
Not only you can buy tableware from them, but also invitations, centerpieces, banners, balloons and party favors.
Their wonderful and friendly customer service and quick shipping makes shopping from this company
a very enjoyable experience.
   This is a list of the products I used to create this tablescape.

And if you need inspiration to create your own party, you can visit their Pinterest page. So many beautiful ideas!

Thank you all again for visiting!
Enjoy the rest of your week!


*Disclosure: Party Pail provided me with these products. I received no compensation for writing this review and all opinions are strictly my own.


Tuesday, July 1, 2014

COAT CLOSET REINVENTED


On this July 1st and with temperatures in the very high 90's, it feels kind of strange to talk about coat closets.
The truth is that this past winter has been the only time in many years that we actually used our coats, maybe that is why our coat closet was a horrific disaster. LOL

A few weeks ago I was inspired by a post from a fellow blogger and friend, Vel at Life & Home at 2102.
She organized her closet beautifully, so I decided to give it a try. Have to tell you, this was a whole day project. :)

Our coat closet is located in the center of the hallway, between the entrance hall and kitchen/living area.


Related Posts Plugin for WordPress, Blogger...